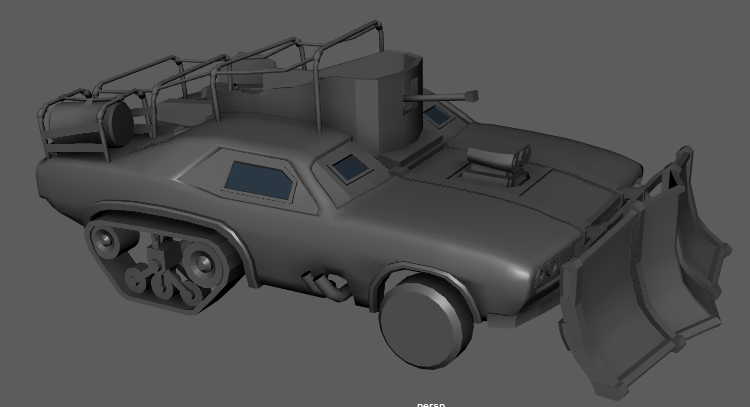
As an update to the prior post we have the partial blockout/ partial low poly model. As I had hand drawn all my concepts and had a multitude of reference avaliable from the planning stages, my blockout ended up being far more detailed that originally expected but this is mainly as I prefer to further concept the vehicle using the blockout, adding basic detail to areas as more of a trial run and test out the silhouette. I find that by adding these details in early, i can gain a much nicer idea of the final product, stopping myself from have to spend extra time constantly changing both large and small details later on in the modelling process.
The vehicle may not looks like a blockout at this stage but in comparison to the detail that i'll be adding in both the low and high poly, it is most definetly still in blockout stage. Adding little details such as the lights and slight bevels were only placed to give myself a better understanding of what i wanted in the finalised design.
Modelling Workflow
As im quite comfortable with my modelling process, I like to create my high-poly model first, making full use of the smooth preview, crease tools and supporting geometry (most edge loops) to fashion the shapes i wish to have in the finished product. This does kind of make a breakdown fairly difficult;
-I start by creating a blockout, avoiding all triangles.
-Whilst creating the blockout, structure slightly more detailed components within it to ensure i'll be mostly happy with the finished product before it's even created.
-Slowly add more geometry to each key component until it roughly resembles the shape and has a suitable tri count for a low poly asset. Keeping the topology nice and neatly flowing to support smooth preview.
-Add extra edge loops and make full use of the crease tool until I have all but the fine details displaying nicely within smooth preview.
-Continue to use this methodology across each and every component in the vehicle, starting with the large pieces before moving to the smaller components.
-With a nice yet detail lacking high poly made, i go back through each component to add all the extra smaller pieces that really bring the model to life.
-A duplication of the high poly is made, both are placed on seperate layers before locking the original, setting it to roughly 30% opacity.
-I then begin to remove any supporting edge loops and add extra geometry or take it away from areas that require it until i have a low poly that matches the silhouette of the high poly as nicely as possible.
Following these steps, the high, low and blockout are practically created at the same time, using the blockout as a concept to build details on to once i'm happy.

No comments:
Post a Comment